Dubbing Film @ Crossfade Bintaro
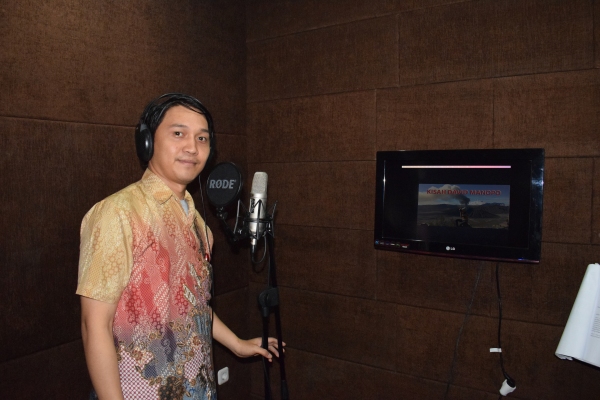
Sedang Dubbing @Crossfade Bintaro
#KisahDavidManopo
#HopeTheBestForThisFilm
SIAP
Kapan Siap nya?
Green Peace

Greenpeace Donation Certificate
Organisasi lingkungan…
Suatu hari telpon berdering dari Greenpeace, inti nya mau minta dana…
Ehm, biasalah sumbangan2 gitu… Sepertinya gw pernah ikut ngisi2 angket tentang lingkungan gitu mungkin dari situ.
Gw coba samperin ke kantornya 26 Agustus 2015, di jalan Mega Plaza Building Lt. 5, Jl. HR. Rasuna Said
Akhirnya ngobrol2 gitu dan ok juga, sebenarnya berpikir ngefek ga sih sumbangan itu…

Dan ga lama Greenpeacce ada acara, 26-27 September 2015 ngadain acara di Pantai Baru, Kabupaten Bantul, Yogyakarta
Namanya Buru Baru Festival, merupakan bagian kampanye dalam mendukung penggunaan energi terbarukan.


yo wes, berangkat naik pesawat, pulang naik kereta, beli nya on the spot, karena ke jakarta ga ada, jadi naik ke bandung dan dari bandung naik bis ke jakarta… dan naik bus ke jakarta, duduk di paling depan, karena bus sudah penuh duduk lah di paling depan (mungkin itu tempat duduk untuk kenek) subuh bus jalan, dan ditengah perjalanan… Oh My God, bus di depan tiba2 ngerem, supir bus kita cepat2 nginjek rem namun rem busnya blong, gw liat ke supir ga ada paniknya sama sekali apa mungkin dia pasrah, tapi tetap berusaha nginjek rem…
Dan suasana tampak tenang semua, ga ada terikan sedikitpun dari penumpang, apa mungkin mereka pada tidur, Dan akhirnya bus kita menabrak bus di depan, menyebabkan kaca2 mobil kita retak…
bersambung…
Happy Mimpi, Membuat Warung

Part 1 :
6 April, hari itu saya ngobrol dengan Pak Happy… seorang messenger kantor saya, sesuai namanya dia selalu happy gitu, dan gw banyak belajar dari dia… Orang yang berjasa buat saya untuk nganter & ngambil hasil2 cetak, nganter barang ke klien, bahkan saat libur pernah dia harus datang ke rumah saya untuk ngambil hardisk.
Bapak berumur 57 tahun, dengan rumah yang jauh dia naik motor 2 jam untuk berangkat.
Mempunyai cita2 untuk membuat warung… istrinya sudah sakit2an, ada gula dan asma, hoby nya adalah melakukan pekerjaan rumah dengan tujuan untuk membantu sang istri. Semangat dan pengorbanan nya buat keluarga nya sangat saya salut… Maju terus Pak.
Part 2 :
Siang 11 April 2017, gw makan siang bareng lagi dengan Pak Happy, messenger kantor gw ngobrol2 dan bertujuan melanjutkan obrolan dan mimpi nya dia untuk buat warung di rumahnya… gw belum tau bisa lewat mana nanti nya, tapi gw mulai dengan being gw untuk menolong dia… Dia sangat terharu dan sampai beberapa kali ngomong terimakasih, walau belum terwujud baru dalam niat…
Part 3 :
Sore 19 April 2017, dikenal dengan hari pemilu DKI Jakarta, hari itu saya berangkat ke tempat Pak Happy, liat rumahnya dan tempat yang ingin dibuat warungnya, dan ngobrol2 lagi… Akan kah mimpi buat warung itu terwujud, di bulan ini, bulan depan atau tahun ini atau tahun depan atau tidak sama sekali. Kita berusaha yang terbaik, selanjutnya serahkan pada Tuhan.

Melihat Posting Tahun Lalu

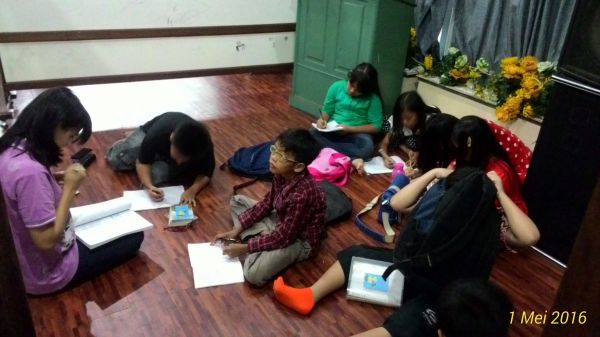
INA Home Schooling & Komunitas anak jalanan kebon nanas…
Suatu hari saat saya mengajar, saya melihat tempat yang sangat kecil dan merasa tempat nya tidak layak, tempat yang kotor dan bau kotoran kucing. Kurang lebih 2 Tahun mengajar disitu. Hingga akhirnya saya ga bisa bantu ngajar rutin lagi, hanya sempet jadi voulenter dan 2 tahun jadi Ketua panitia perpisahan untuk kenaikan kelas.
Hingga suatu saat kita ngobrol2 dan akhirnya membuat proposal untuk dimasukan, dan berkembang menjadi membuat malam dana…
Dan ngobrol2, akhirnya sayalah menjadi ketua, yang gw masih sedikit inget sih, meeting pun dilakukan, dan hasil dari meeting bagi2 tugas, saya bla bla bla, dan disepakati yang lain ada yang cari tempat, ada yang bayar DP ke hotel/tempat nya… Kemudian meeting berikutnya, bertemulah kita, bla bla bla.
Saya : Gimana tempat untuk acara dah di DP.
Panitia A : Belum, karena bla bla bla.
Saya : Kesepakatannya apa? Bayar kan
Panitia A : iya
Saya : Kenapa ga kabarin? Tempatnya dah dicari.
Panitia B : Udah, disitu ada yg begini, begini, begini
Saya : Nomor contactnya berapa, ngomong sama ibu/bapak siapa? Ada fotonya ga…
Panitia B : Ga nyatet, Ga ada
Saya : Ehm, Ok lah
#BadmoodTotal, dan menghilang lah saya
Butuh kopi… Menenangkan diri, merenung
Yes liat goal nya…
Berjalanlah normal kembali, konsepnya buat undangan untuk dijual dan sampai mau deket hari H kalau ga salah seminggu, biaya sewa gedung masih belum cukup, wah masa rencana cari dana, malah nanti bisa2 nombok nih, berpikir ditunda aja, tapi kesepakatan meeting team tetep jalan terus, Iman sama nekat beda tipis harus bener2 peka. Puji Tuhan surplus walaupun belum full untuk biaya kontraknya apalagi beli. Puji Tuhan setelah event ada yang ngundang ke kantor nya, dan presentasi dan akhirnya mereka mau bantu untuk Tempat, bukan Cuma itu, dapet AC, Desain Interior nya, Komputer 4 Buah, Keyboard, Sound, ditanggung listrik bulanan, gaji tambah guru dll, padahal orang itu diundang tapi ga dateng pas malam dana nya…
To be continued
Menulis…
Menulis adalah hobiku….
Menjadi penulis cita2ku…
Menulis sebuah harapanku untuk setiap pembaca menjadi terinspirasi…
Mari menulis
#PinkyPromise Setiap Janji Punya Warnanya Sendiri

Akhirnya film Pinky Promise Rilis di bioskop
Sebuah kisah yang sangat keren,
Sedihnya Dapet, Ketawanya pun dapet,
Penanaman nilai2 kehidupan dapet, Edukasi nya juga dapet,
Drama Persahabatan dapet, Kesadaran untuk menjaga kesehatan juga dapet
Kisah perbedaan umur, jenjang sosial.
Saat serius maupun becandaan nya juga dapet…
Film yang menginspirasi
Terimakasih untuk semuanya.
English course


How if i course english…
Bersambung lagi…
Kulihat…

Tidak jauh beberapa blok dari rumahku,
Kulihat peristiwa ini…
Kulihat air mata jatuh di kubu yang kalah, yaitu kelaurga dari ahli waris yang tiada berdaya.
Kulihat Bahagia di hari itu dirasakan oleh pemenang,
Namun, Tidaklah salah untuk menertibkan.
Ingat Sehelai rambut pun tidak akan jatuh tanpa sepengetahuan Tuhan.
Bersiap-siap dan percaya saja.
Tetap Semangat
bersambung
Ayo Film Indonesia… DukungFilmIndo

Jumlah penonton indonesia sampai akhir Mei 2016 ini mengalami kenaikan, semoga bulan2 berikutnya tambah dan bertambah…
Bukan AADC2, Kisah 14 tahun yang lalu
#cerita14tahunyanglalu…
#bukantentangAADC2
Diangkat dari kisah nyata…
Ya AADC2 sampai dengan hari ini masih menjadi film terlaris tahun 2016 ini dengan 3 jt penonton lebih, dan sampai hari ini masih ada 290an layar, saya tau karena salah satu tugas melihat jumlah DCP di studio, base on http://www.filmindonesia.or.id … sebuah film yang melegenda buat anak2 muda, sebagai film reuni jaman dulu… semoga film Pinkypromise penontonnya bisa lebih dari itu atau setara gitu amin… (Dream Again, Dreaming your dream, Memimpikan mimpimu bener ga ya bahasa inggrisnya, please corection)
Tapi saya bukan mau bahas tentang AADC2
Hahaha…
Minggu lalu saat di kelas, melihat anak2, syela dan nathalie, lagi melihat foto, saya mengambil/menyita foto tersebut…
Karena penasaran juga melihat foto apa, eh ternyata sebuah foto aunty nya nathalie, mengingat 14 tahun yang lalu gitu, jadi OSIS dan harus ngospek gitu…
Dan ternyata dia masuk dalam group gw, ya langsung di ospek lah suruh bawa cokelat, makasih ya cokelatnya and nyuruh2 pushup lah…
Besoknya papi nanya, michael ngana ada ospek kata tuh jenifer, oh papi kenal… iya dia masih sodara… hahaha, ga tau pa, sory 🙂
Ini Ceritaku, Mana Ceritamu
Ini Kisahku, Mana Kisahmu
#kisahdavidmanopo
Bersambung…


